One query we often get from our customers, is why can't they send a personalised mailshot. It often surprises us because this functionality has existed on PC2Paper for nearly 10 years. We suddenly realised that maybe we're just not that good at advertising the features available on our service so will be starting a series of blog articles to highlight some of them. The first being how to do a mail merge with our service.
This tutorial will show you how to send the same letter to multiple recipients, personalising each one with the recipients name and address using our mailshot letter writing interface and a spread sheet of your recipients details. You will write your letter online using our letter writing interface and can attach as many PDF's as you wish to the letter.
Before you continue with this tutorial, ensure you are logged into your PC2Paper Account in order for the links below to work.
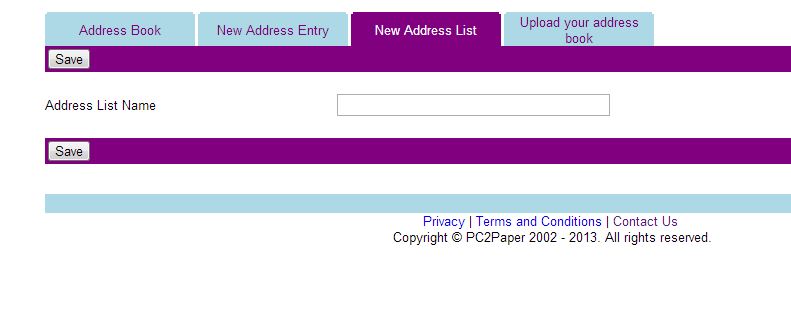
Step 1 - Create a new Address List/Book
You can create a new Address List from the My Address Book section of the site click here to do so (will open in new window). You can also manually navigate here from the website by clicking on the "My Address book" option from with the PC2Paper Website.
Step 2 - Upload your address list
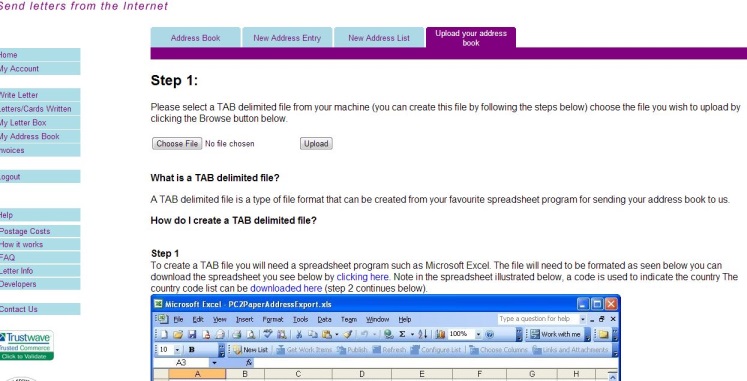
You can do this from the My Address Book section of the site. To upload your address book click on the "Upload your address book" tab or go to the following link upload my address book (will open in new window) and follow the steps on the page.
Step 3 - Name your mailshot
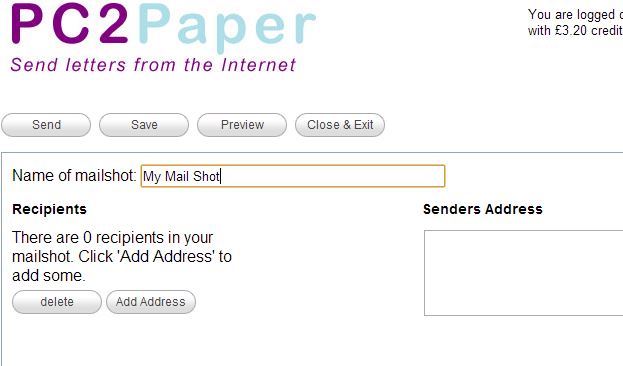
If you haven't already done so go to the mailshot writing interface, you can go to it directly by clicking here or by clicking on the write letter option from within the PC2Paper website.
Give your mailshot a name.
Step 4 - Choose you address list
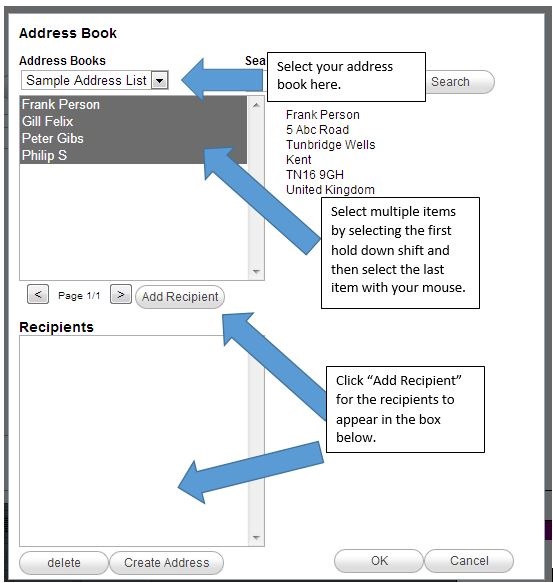
Click the "Add Address" button and select the address list/book you uploaded in step 2 above. Select the recipients, you can select multiple by selecting the first item and then holding down the shift key as you select the last item. After selecting your recipients select the "Add recipient" button and then the OK button. You can also add more addresses manually at this stage.
Step 5 - Create your letter
In this example we are using a template to create the letter. You do not need to use a template you can create your own letter from scratch.
Step 5a
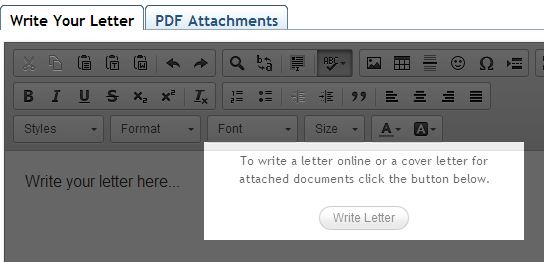
Click on the "Write letter" dialogue.
Step 5b - Template
Choose a template by clicking on the template icon (indicated in the image below).

Step 6 - Your Letter
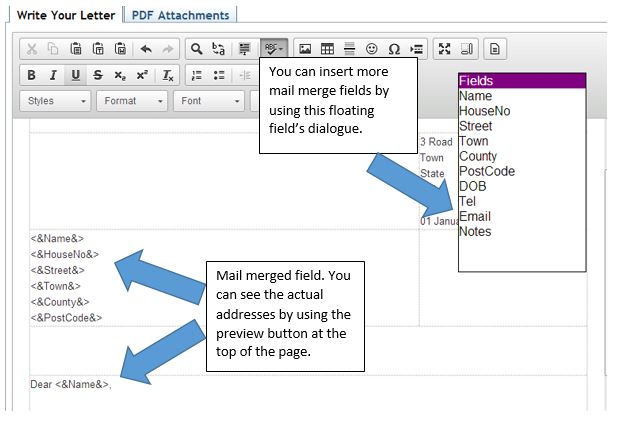
After selecting a template you should see something similar to the image below. The odd looking characters that begin with <& are placeholders for the various details of your recipients. To see what the letter will look like when sent to us press the "Preview" button at the top or bottom of the write letter page. You can insert further mail merge fields using the floating Field dialogue box shown below.
Step 7 - Preview
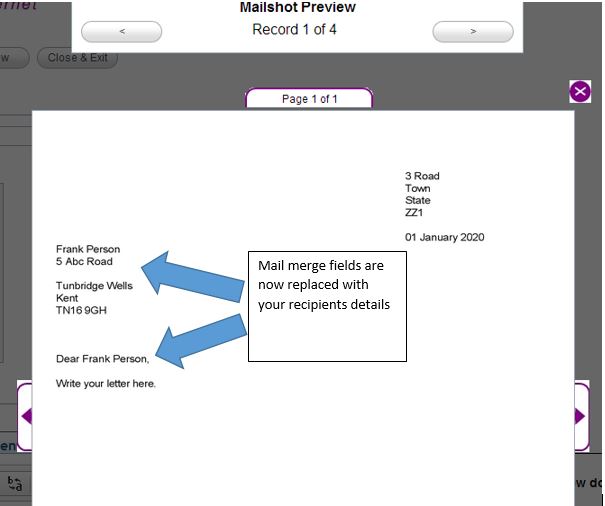
You should now be able to see previews of your mailshot by clicking on the Preview button located at the top or bottom of the write letter page. Using the arrows shown below you can scroll through a preview of how your letter will look to each recipient. When you are happy with your preview, close the preview click on the Send button (at the top of the page) to see how much it will cost, select postage options and send your letter to us for printing and posting.
Step 8 - Attach PDF's (optional)
Don't forget you can also attach PDFs to your letter by clicking on the "PDF Attachments" tab.
Step 9 - Insert your signature or an image (optional)
To personalise your letter further you can also insert an uploaded image of your signature find out how.